Back to Safety Center Main Menu
Library Plans can also be used to add another layer of information inside a plan, known as Plan-in-Plan. The Library plan can be created as one entire piece of content that, when a user taps the icon on their device, will open a new layer of event icons to select from. You can have an infinite number of Plan-in-Plan layers.
Watch the Video Tutorial:

Creating a Library Plan for use as a Plan-in-Plan
When setting up a Library Plan for use as a Plan-in-Plan, you will follow the same steps creating a Library Plan.
- Click the Safety Center logo in the top left corner of the screen to access your home page.
- Click on the Plans tab and then click on Create Plans from Template.
- Select the default plan under Template Name and click Create Plan(s) From Template.
- From the My Plans page, click Edit beside the newly created default plan to open the plan.
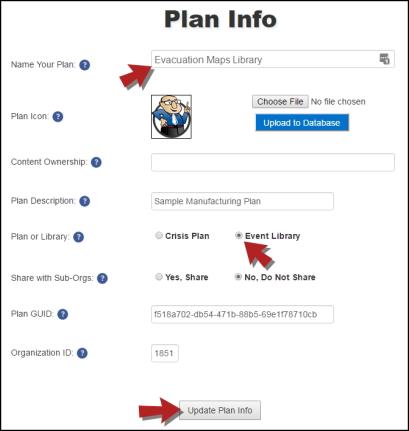
- Rename the library plan.
- Select Event Library and click Update Plan Info to save changes.
- Click on the Event tab and then click on Event Sequence. Create event icons for just the items you want to appear in this layer within your plan.
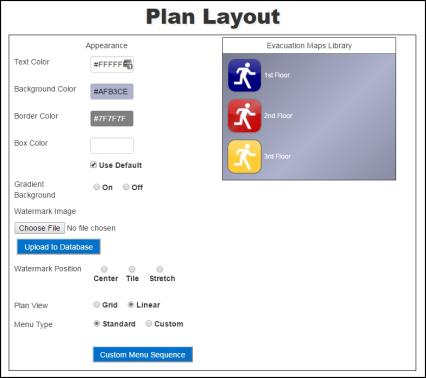
- Click on the Plans tab and then click on Plan Layout.
- Select the event icon you want to enter content for and click Edit.
- Enter and format your content for this event.
- Click Update to save changes.
Publishing a Plan-in-Plan
- Click on the Plans tab and then click on Publish Plan.
- Select Submit Plan for Publishing Approval.
- Click Approve and Publish.
- On the home page, either create a new plan or Open one from the Recently Updated Plans section that you want to add this Plan-in-Plan to. *Note: If you do not see the desired plan there, navigate to My Plans and click Edit next to the desired plan.
- Once the plan is open, click on the Event tab and then click on Event Sequence.
- Click Add Event and then click Edit on that new event.
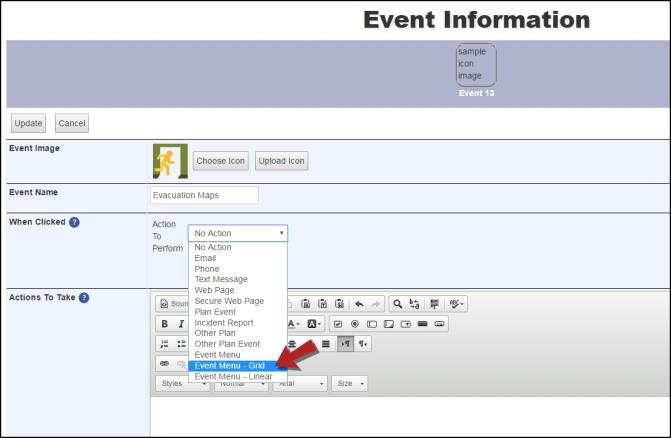
- Click the Edit button on the event. Rename the event and choose the icon to represent the Plan-in-Plan.
- In the Action to Perform drop down, select one of the Event Menu options.
- The screen will refresh to show more options where you can select custom colors for this Plan-in-Plan layer.
- From the Available Events to Add section, open the Library Plan you want to use and select the events to appear in the Events box on the left.
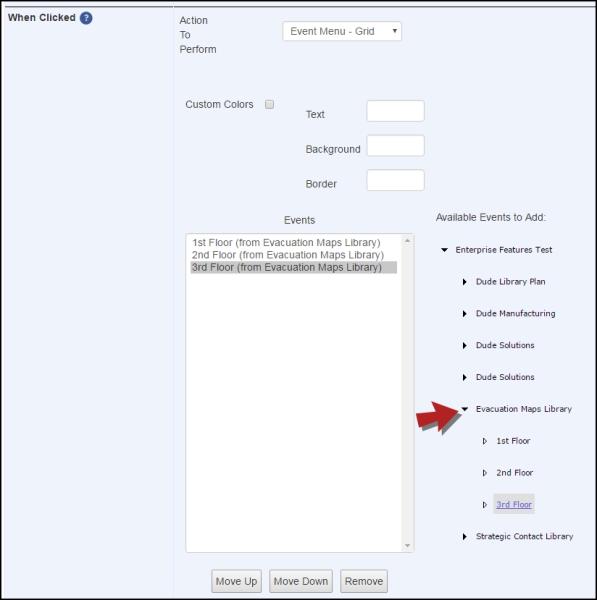
- Click the Update button at the top of the screen.
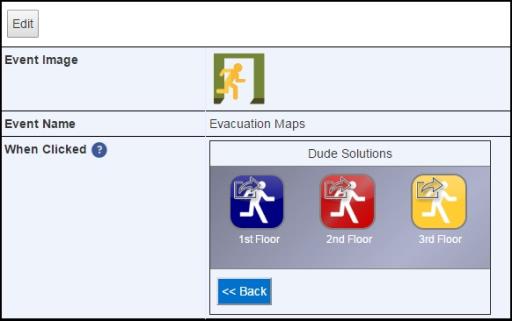
- The screen will refresh to show you what the screen for this Plan-in-Plan layer will look like when you tap on the event.
- Continue publishing the plan as normal.
